Woo hoo! One week of healthy lunches and budgeting and meal planning done- and it was fun, to boot! :)
Menu for this week: (there may be one or two meals that rollover per week depending on any last minute changes that occur)
Monday- Chicken & Broccoli skillet meal & breadsticks
Tuesday- Double date night! Looking forward to some qt with Mike & Kayla from two plus bink
Wednesday- Jack Daniel's BBQ Pulled Pork sandwiches with salad and green beans
Thursday- Baked spaghetti, salad, & breadsticks
Friday- Venison meatloaf, mashed potatoes, & green beans
Saturday- Blue corn tortilla chip nachos
I hope everyone has a wonderful week!

Monday, January 28, 2013
Monday, January 21, 2013
Yumday Monday
Y'ALL<
That last two days have been awesome. Just. awesome.
Yesterday, we attended a Budget Class hosted by our church, Newspring. Now, I wasn't expecting much, to be honest. I thought to myself "I know what a budget is & we've tried to budget before, but I just don't think it can work for us." Boy was I wrong!
Our church has a saying: "Every number has a name; every name has a story; every story matters to God." People tend to think that because our church is so large with multiple campuses there's no way they can feel included and valued- and there is nothing farther from the truth. Check it out if you don't believe me. :)
Anyway, at our Budget Class the instructor told us to think about our money in the same way: "Every dollar has a name; every dollar has a story; every dollar matters to God." And for the next hour and a half she opened our eyes to making every single dollar that passes our hands honor God and bring blessing to our little family. Seriously amazing, guys. In the Stewardship area of the website you can access their monthly and weekly budget plans that are simple Excel documents. You just plug in your info and it does all the calculating for you! If you struggle with impulse spending like me, it will help you. If you are working paycheck to paycheck and feel like you'll never be able to save any substantial money (like us), it will help you. We are so excited to actually see on paper what we never thought possible for ourselves.
Which leads me to my next point- Food!
My husband & I love to spend time together in the kitchen. However, sometimes the urge to place an order over the phone or pick something up on the way home is too good to resist when you can't remember what's in your pantry & you don't know how long it will take to prepare.
This also applies to lunch- I'm more likely to eat unhealthy school lunch (chicken sandwich, chips, cookie) and Josh is more likely to eat fast food when we're scrambling around for something quick to grab and go in the mornings or we're bored with PB&J's.
Earlier today I found the blog BentOnBetterLunches and it is so cool! This lady documents the awesome, creative lunches she packs for her children and husband. There's a cool way of putting food together called Bento that involves making 'scenes' out of the food- really just making it fun to look at and eat! I spent hours today pouring over her ideas and checking out the healthy foods she incorporates into her family's lunches.
In order to help stick to our new budget as well as create a healthier eating lifestyle, I need accountability. So I hereby declare each Monday "Yumday Monday"! I'm going to try and share our weekly menu each Monday so that I can:
-Plan meals ahead of time to keep from impulse buying at the grocery store
-Hold myself accountable to cooking meals at home and not ordering out during the week
-Share more recipes with family and friends
-Keep variety in our menu so we don't get bored of the same meals over & over
I'm going to start just sharing suppers and work toward sharing lunches & suppers. I'm beginning packing healthy, organized lunches tonight and am going to give myself a week or two to get used to it before I start sharing what I'm packing.
First official Yumday Monday:
Monday- Breakfast for Supper (double chocolate muffins)
Tuesday- Parmesan Garlic Baked Fish with Salad and Steamed Corn
Wednesday- Crockpot Hawaiian Barbecue Chicken with Steamed Green Beans & Yellow Rice
Thursday- Baked Spaghetti with Garlic Breadsticks and Salad
Friday- Date Night! (thanks to our new budget! :D)
Saturday- Venison Meatloaf with Mashed Potatoes and Salad
Sunday- Velveeta Chicken, Broccoli & Cheese Skillet Meal
Have a yummy week!
-A
Friday, January 18, 2013
Laundry Room Overhaul
So, Christmas Break for teachers is what gets us through September-December. It's like the beaming BP sign that brought about tears for me one time as I was lost in no man's land with my gas light on and certain I was going to run out of gas and be murdered by a crazy half scarecrow half demon. True story. Anyway.
This holiday break brings about a collective sigh of relief. Time to rejuvenate. If you know me, you know I can't hold still for long. Unless I'm sick. Then I lay on the couch like the pathetic wimp I am begging for chicken soup and crackers.
So when morning broke that first day of my break, I was elated to turn my focus from my little wriggling buckets of hormones to something that has been dying for just as much attention: my laundry room.
*Insert scary music here*
Who would want to do laundry in a room like that?! Don't get me wrong- I'm very thankful we found a house with a laundry room instead of a laundry closet. Very thankful. But it's hard to be motivated to wash, dry, fold, and repeat a billion times if you have to do it in an ugly setting.
So I fixed it.
I started by taking everything out of the room and taking down the piddly shelf. I then wiped everything down with a damp rag and vacuumed up the tons of lint everywhere. I'll get to the source of the lint problem in a second.
Because the room is narrow and long and it was only me, I couldn't completely move the washer and dryer out to paint. So I commenced a painting tango with the two. I carefully unplugged each and as I went to remove the flimsy lint vent coil thing it tore into about a thousand pieces. Okay, more like three. Seeing how crazy cheap it was I realized that it was the reason there was always lint building up all over the laundry room. The dang thing was letting the lint escape instead of sending it wherever it's supposed to go. I was thankful to my creative side, because otherwise we would have never found this little problem.
So after a quick call to the hubs to tell him to pick up a better lint thingy I began painting. I started with my accent wall. It's the same green paint (Ace Hardware's Gleeful Green in Satin) we used in our kitchen- so not only was it free, I also feel like it would make the house more balanced colorwise. The top was easy since all I had to do was stand on a chair to cut in (paint the top and corners and sides with a brush) and then roll it. When I got down below the washer and dryer I debated just stopping since no one would see that it wasn't all the way painted, but I was feeling ambitious and knew it would bother me forevah if I didn't. OCD. That's me. So my technique was to scoot the dryer out as far as I could while leaving the washer in place and getting behind the dryer, and then pushing the dryer back enough to not touch the wet paint but to make room to push the washer out. Then I painted behind it.
Next were the walls on either side. Boogers. For this I had to push one machine as far forward as I could get it and the push the other one as close behind it as I could to open enough space to paint. For the rest of the walls I used the same paint we had in our living room and hallway (Ace Hardware's Crushed Peanut in Flat. I don't like flat paint but I couldn't get this color in eggshell. Le sadness.) So again, not only was this paint free but it also kept the house cohesive and balanced in color.
After all the hard spots were done, I painted the rest of the walls in that tiny room. Josh is going to have to repair the drywall and door frame at some point, so rather than stress about it I just globbed a bunch of paint over it to at least camouflage it some.
When the painting was done and dried, my first priority to putting the room back together was adding more storage. I removed the small wire shelf and filled the holes in (pretty unsuccessfully- I need a course in spackling. I suck at it.) before I painted. Using some gift cards I received from some students at school for Christmas (Holla! They're so sweet) I purchased a larger shelf of the same brand from Walmart. I would have loved to have built some custom wooden shelves or even purchased some cabinetry, but we're on a pretty tight budget so one of these days when we're more settled and established (and better at buying/spending/saving) I'll probably add some sturdier shelving more pleasing to the eyes.
Thank goodness hubby was home by this point because I was out of juice. He swept in to save the day (like his does so often. love him so much) and put the smaller shelf closer to the washer since it would house the detergents and stain removing accessories. He then (with my expert guidance) installed the larger shelf I purchased above the smaller one. Right now it just holds extra stuff and pretty things, but I'm thinking down the road it will be great for holding laundry baskets with kids' clothes and such. Or maybe I'll leave it pretty and convince Josh to build a stand that can hold baskets underneath the machine:


This holiday break brings about a collective sigh of relief. Time to rejuvenate. If you know me, you know I can't hold still for long. Unless I'm sick. Then I lay on the couch like the pathetic wimp I am begging for chicken soup and crackers.
So when morning broke that first day of my break, I was elated to turn my focus from my little wriggling buckets of hormones to something that has been dying for just as much attention: my laundry room.
*Insert scary music here*
 |
| I tried to pretty it up with some leftover decorations from my sister's couples shower. Didn't help. |
 |
| Thanks hubby for ripping the door frame off to fix the door and promising to put it back. Almost 2 years ago. |
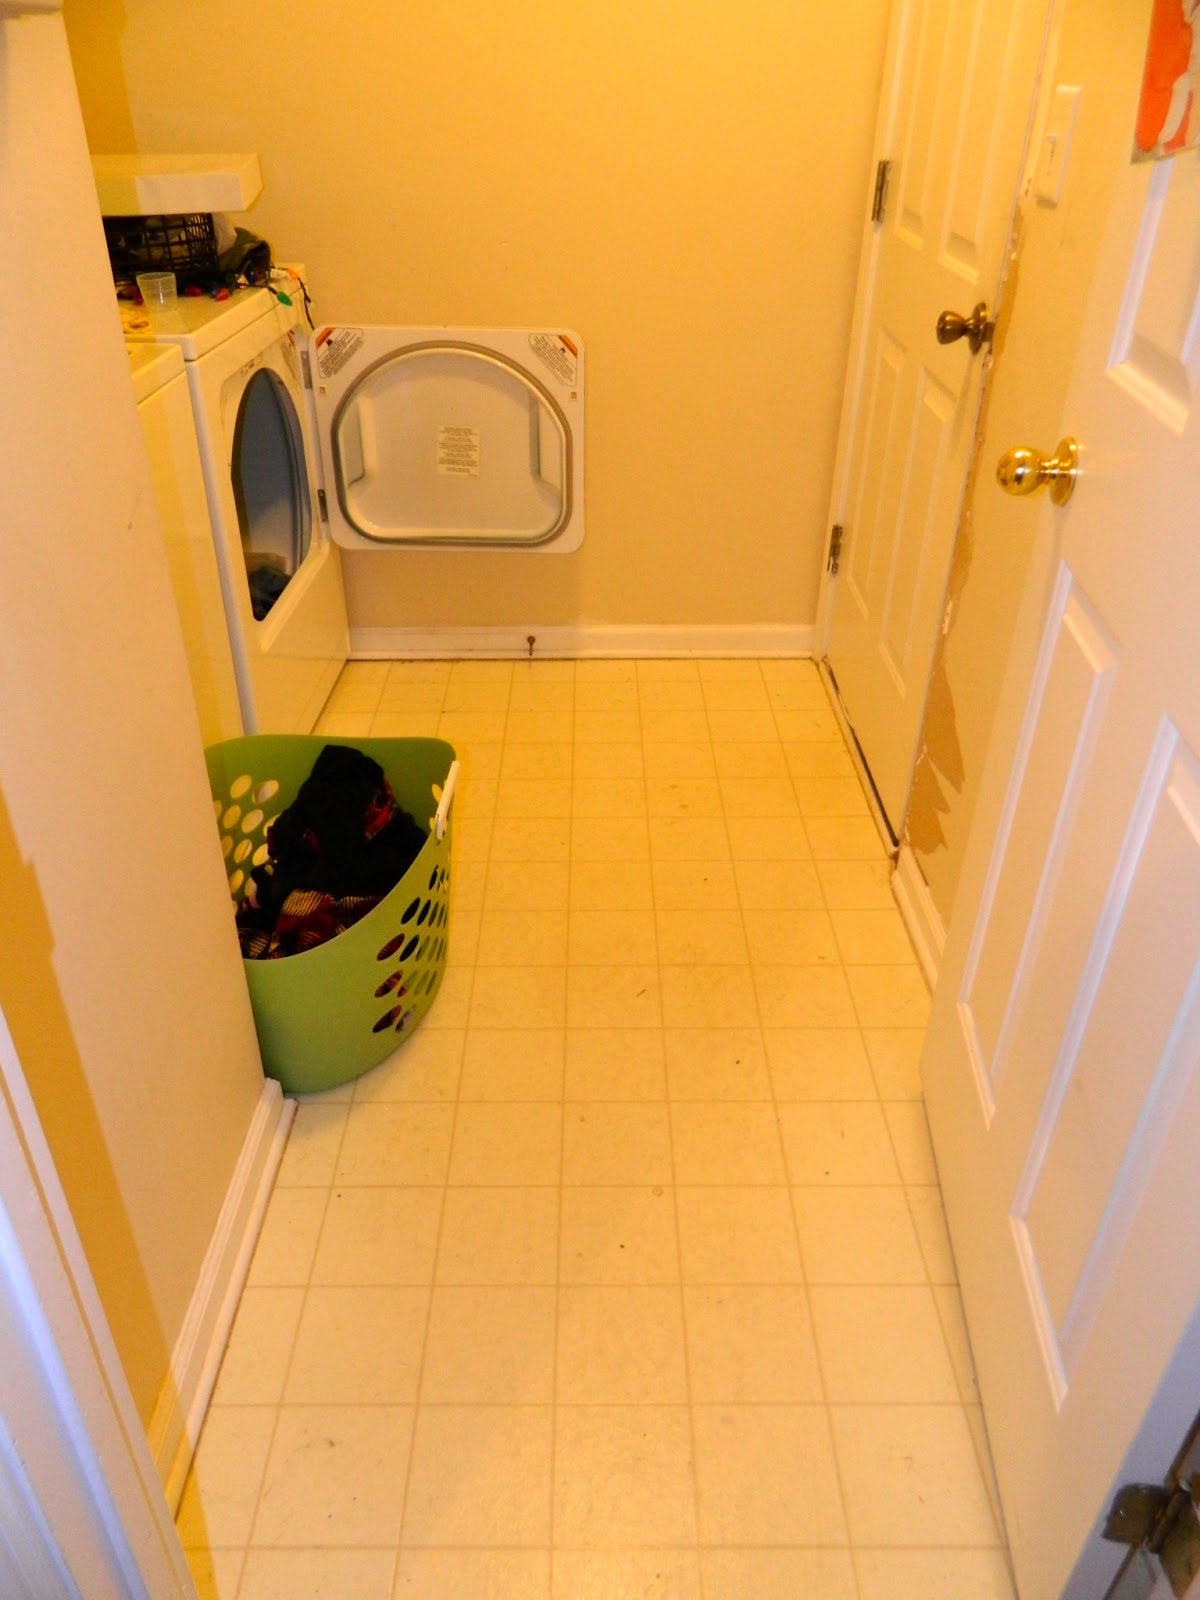 |
| Just. Yuck. And blah. |
So I fixed it.
 |
| So. In. Love. |
Because the room is narrow and long and it was only me, I couldn't completely move the washer and dryer out to paint. So I commenced a painting tango with the two. I carefully unplugged each and as I went to remove the flimsy lint vent coil thing it tore into about a thousand pieces. Okay, more like three. Seeing how crazy cheap it was I realized that it was the reason there was always lint building up all over the laundry room. The dang thing was letting the lint escape instead of sending it wherever it's supposed to go. I was thankful to my creative side, because otherwise we would have never found this little problem.
So after a quick call to the hubs to tell him to pick up a better lint thingy I began painting. I started with my accent wall. It's the same green paint (Ace Hardware's Gleeful Green in Satin) we used in our kitchen- so not only was it free, I also feel like it would make the house more balanced colorwise. The top was easy since all I had to do was stand on a chair to cut in (paint the top and corners and sides with a brush) and then roll it. When I got down below the washer and dryer I debated just stopping since no one would see that it wasn't all the way painted, but I was feeling ambitious and knew it would bother me forevah if I didn't. OCD. That's me. So my technique was to scoot the dryer out as far as I could while leaving the washer in place and getting behind the dryer, and then pushing the dryer back enough to not touch the wet paint but to make room to push the washer out. Then I painted behind it.
Next were the walls on either side. Boogers. For this I had to push one machine as far forward as I could get it and the push the other one as close behind it as I could to open enough space to paint. For the rest of the walls I used the same paint we had in our living room and hallway (Ace Hardware's Crushed Peanut in Flat. I don't like flat paint but I couldn't get this color in eggshell. Le sadness.) So again, not only was this paint free but it also kept the house cohesive and balanced in color.
After all the hard spots were done, I painted the rest of the walls in that tiny room. Josh is going to have to repair the drywall and door frame at some point, so rather than stress about it I just globbed a bunch of paint over it to at least camouflage it some.
When the painting was done and dried, my first priority to putting the room back together was adding more storage. I removed the small wire shelf and filled the holes in (pretty unsuccessfully- I need a course in spackling. I suck at it.) before I painted. Using some gift cards I received from some students at school for Christmas (Holla! They're so sweet) I purchased a larger shelf of the same brand from Walmart. I would have loved to have built some custom wooden shelves or even purchased some cabinetry, but we're on a pretty tight budget so one of these days when we're more settled and established (and better at buying/spending/saving) I'll probably add some sturdier shelving more pleasing to the eyes.
Thank goodness hubby was home by this point because I was out of juice. He swept in to save the day (like his does so often. love him so much) and put the smaller shelf closer to the washer since it would house the detergents and stain removing accessories. He then (with my expert guidance) installed the larger shelf I purchased above the smaller one. Right now it just holds extra stuff and pretty things, but I'm thinking down the road it will be great for holding laundry baskets with kids' clothes and such. Or maybe I'll leave it pretty and convince Josh to build a stand that can hold baskets underneath the machine:

So once the shelves were in place I put my (after summer clearance) Michael's drink containers holding our detergent and softener on the lower shelf. Next to them I put a little chalkboard painted bucket I got at Target for $1. On it I wrote "Check Your Pockets!" because it's where I put random things- ahem, bobby pins Andrea- that I find in our pockets. Next to it is a container from Goodwill that's holding clothespins. Not really functional but completely adorable. Next to it I put a basket that I got from Big Lots for $1.29 that holds our stain removers, Febreze, and dryer sheets. I love the basket because it's shaped like the old wire baskets that are industrial looking, but it's black plastic. Good look, cheap price. Win-win.

The top shelf houses another Big Lots basket with extra detergent. I got the turquoise/teal basket at Dollar Tree and covered everything except that little rectange with tape and a grocery bag and then spritzed it with some chalkboard spray paint I had already. Bam! Lint container (Lint is good for starting fires- we use it in our fireplace, so it doesn't go in the trash)!
The extra space above the dryer is perfect for hanging clothing that has to air dry.
Once I worked out all the functionality kinks, I began makin' 'er perty.
I used a Goodwill frame painted with chalkboard paint and a dollar tree frame to house two cute Scripture prints I found here.


The flowers were another Michael's after summer clearance steal for like 75 cents. I also rehung the lanterns from Ashley's couples shower, but I tossed the garland. It was all tangled and stressing me out.

I printed one of my favorite pictures of Josh and I and hung it in a frame I got for Christmas from my seester.
I love it because it's the last thing I see when I leave and the first thing I see when I get home. :)

Lastly are my two favorite crafts. Using a planter cork board I found in the garden section at Walmart for around a $1.50 as well as clothespins and a mirror from Dollar Tree ($2 all together) I pinned the clothespins around each and hung them up with Command strips. Easy peasy. The mirror is like a baby sunburst mirror, but with clothespins (cheesy laundry theme. Love it) and the cork board is perfect for those rogue socks that are lost without their mate.

The Laundry printable is another Pinterest find, but I forgot to pin it and now can't find it again! I printed it but it was too small for the frame so I just cut out the edges and stuck it up there with some decorative tape I got at Michael's.
Budget breakdown-
Paint- Free! (on hand)
Shelving- $15 (technically free, gift cards used)
Baskets, buckets, etc- about $5
Hangers- $1
Frames- $1, gift, on hand already
Clothespin crafts- $3.50
Everything else was already on hand
Total: $25.50
Holla to save a dolla y'all! Not only do I love using what I already have and repurposing- it makes my husband very happy to come home to something so drastically prettier and more functional and better overall and yet so cheap!
So I am now in love with my laundry room. There it is; never thought I would say it. It was a lot to accomplish in one day but I was determined. Now the only two rooms that have not been touched with my DIY madness in our house are the spare bedroom and the bonus room. Maybe they will get tackled during Spring Break (another 'light at the end of the tunnel' for teachers. ) or Summer (the ultimate 'light at the end of the tunnel for teachers!).
Before & After- aka :( & :)
|
And you can ask Josh- laundry is SO not an issue now. :D
Also- Josh bought an aluminum hose lint thingy at Ace Hardware that has been a million times better than the flimsy thing we had before. It took him a while to get it attached, but there are no longer layers of lint in the laundry room. Lovely alliteration. ;)
Next post is gonna be about some serious organization that happened over the break. Can't wait to share!
Until then,
-A
Sunday, January 13, 2013
One Last Little Bit of Cheer
It's not too late to share a little more holiday cheer is it?
Good.
I thought I'd share my favorite parts of our holiday decor as well as some shots from New Year's. I've got some awesome projects from my holiday break to share in the coming weeks, but first thing's first!
Our Mantle- Our lighted garland, picture frames, and stocking hangers are from Walmart (clearance after Christmas 2011). The moose came from Burke's outlet (regular price, Christmas 2011), the figurines from the dollar tree (some time in college), the pinecone candlesticks and red candles came from Hobby Lobby (Black Friday sale 2012), and the small trees (bottom left) came from Target (clearance after Christmas 2011). I sewed the stockings using purchased flannel, leftover scrap green checked fabric, and burlap from our wedding. You can read more about that over on my Burlap Project page. :)

 Lighted Village- I am so excited to start a little village! I love all things miniature! I got the coffee shop as a Christmas gift this year and picked up the trees, lamp post, and sweet newlyweds (aw!) after Christmas on clearance from Walmart.


Nativity- Our nativity is simple and one piece, and I love that about it. I made the printable (I'd love to email you a copy! Just drop me a comment. :D ) and the sweet figurine came from Burke's outlet (Christmas 2010).


Sweet moose couple came from Burke's outlet (Christmas 2011).
Centerpiece- Cranberry candle holder was a Goodwill find, the salt and pepper shakers came from Cracker Barrel (99 cents a piece!), and the tealight votives were bought on sale at Michaels this year.


 Stove- Snowman/Santa figurine is an old decoration from my childhood, the gold glitter tree came from Dollar Tree some time in college (circa 2008), the snowman teapot is from ABC Distributing, the snowflake cookie cutters are from walmart, the santa spoon holder came from Dollar Tree I think, and the printables I got from blogs I found through a Pinterest search.
We spend New Year's with some family and had a blast watching the Clemson game (I'm pretty certain my husband cried... he won't admit but I'm almost certain he was overcome with emotion! Haha!) and I played with the 'fireworks' setting on my camera and got some pretty awesome photos of the action-


The last one is my favorite. :)
I hope your new year has been full of promise and potential!
Until next time,
-A
Good.
I thought I'd share my favorite parts of our holiday decor as well as some shots from New Year's. I've got some awesome projects from my holiday break to share in the coming weeks, but first thing's first!
 |


Nativity- Our nativity is simple and one piece, and I love that about it. I made the printable (I'd love to email you a copy! Just drop me a comment. :D ) and the sweet figurine came from Burke's outlet (Christmas 2010).

Our Tree- The tree (Target clearance after Christmas 2010) is a collection of childhood/sentimental ornaments, ornaments on clearance from Walmart and Target, garland from Target and Garden Ridge, ribbon from Michaels, picks from Hobby Lobby, Target, & Michaels, and the tree skirt is from Ross (Christmas 2010).


Centerpiece- Cranberry candle holder was a Goodwill find, the salt and pepper shakers came from Cracker Barrel (99 cents a piece!), and the tealight votives were bought on sale at Michaels this year.


We spend New Year's with some family and had a blast watching the Clemson game (I'm pretty certain my husband cried... he won't admit but I'm almost certain he was overcome with emotion! Haha!) and I played with the 'fireworks' setting on my camera and got some pretty awesome photos of the action-


The last one is my favorite. :)
I hope your new year has been full of promise and potential!
Until next time,
-A
Subscribe to:
Posts (Atom)